
One City Photograph: From Capture to Final Export
A complete CineLook workflow for one representative city photograph: read the light, choose a direction, refine, compare, and export.
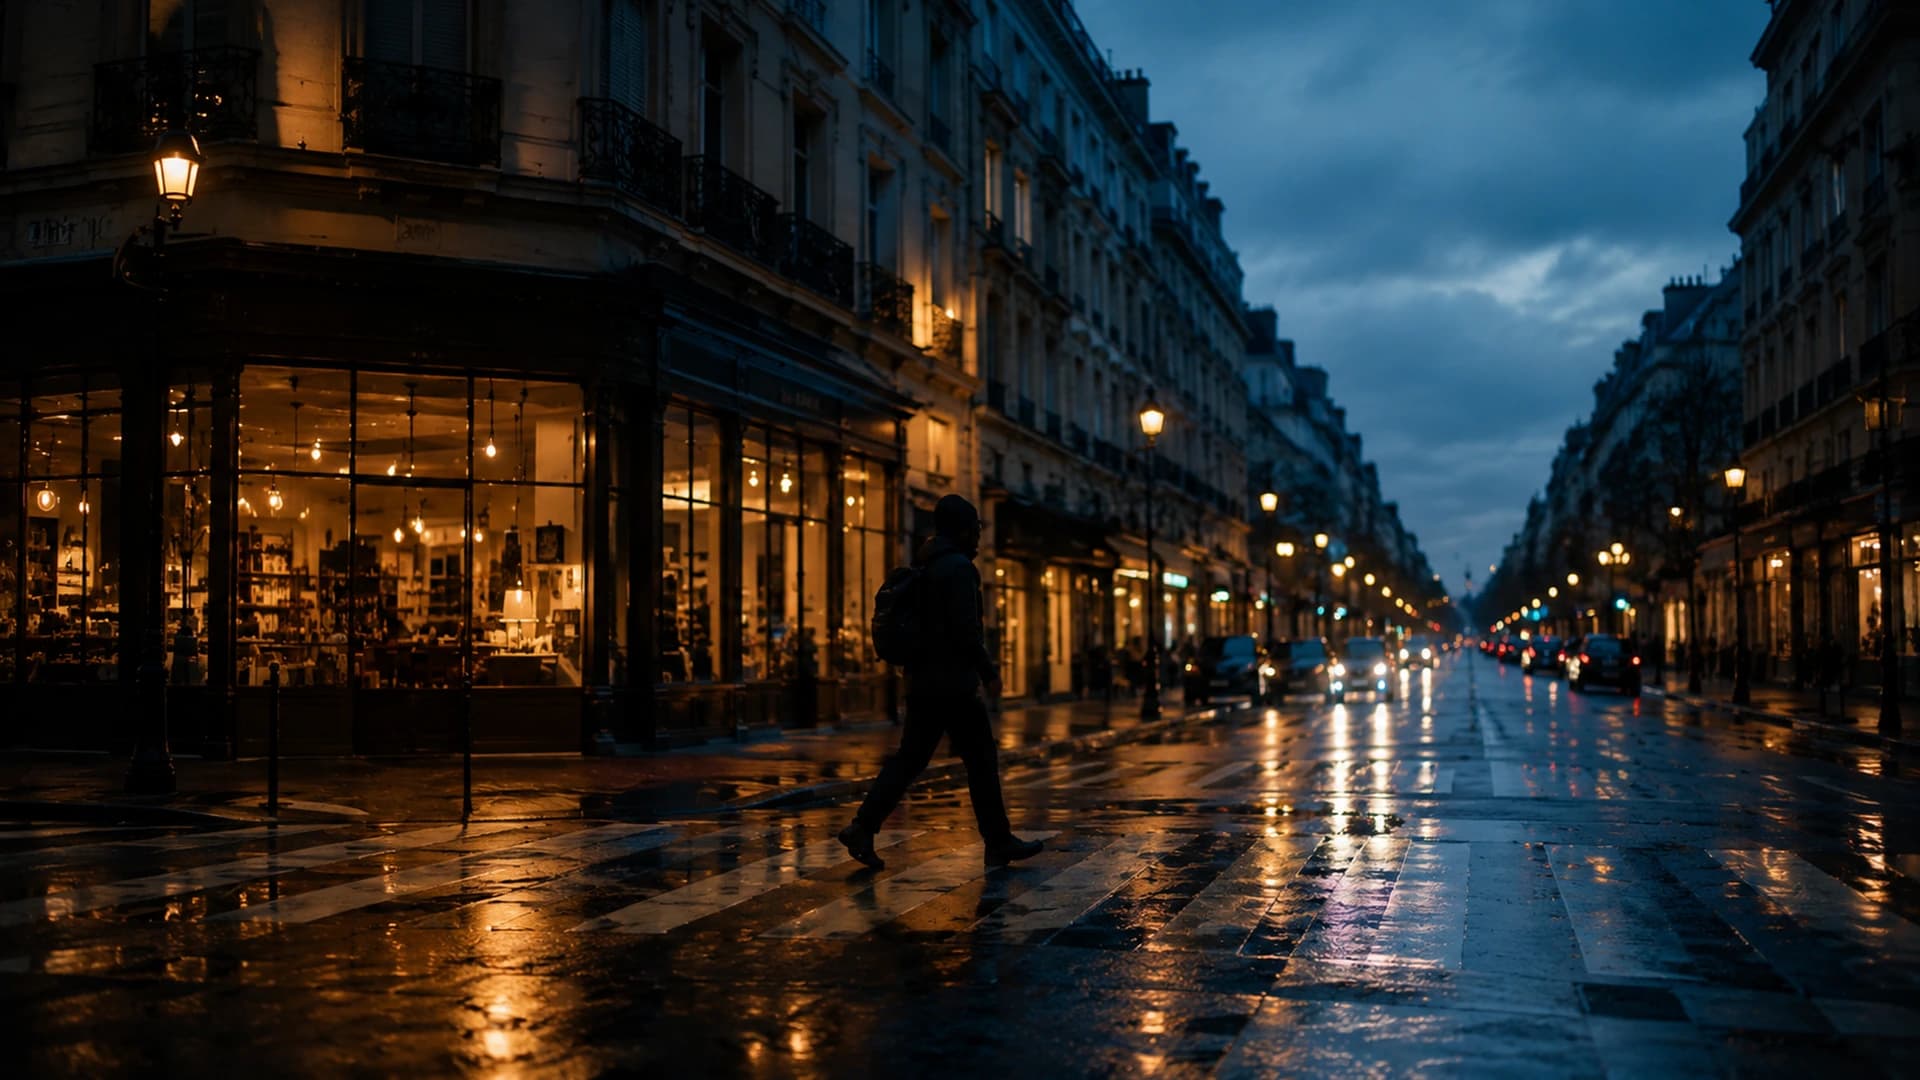
Consider a representative city photograph rather than a documented shoot: a person crosses a wet street near dusk. Storefront light warms one side of the frame, the remaining sky is cool, and reflections break across the pavement. No named location, camera, lens, or exposure is needed to discuss the image. The useful material is already visible in the relationships between subject, light, color, and space.
1. Start With the Photograph
The person is small but provides scale and direction. A bright shop window pulls attention from the left, while a pale strip of sky holds the upper edge. The pavement reflections connect warm and cool regions. The first editorial decision is to preserve that tension. Making the whole scene warm would weaken the transition into evening; cooling everything would remove the human invitation of the storefront.
The source also contains a tonal problem worth respecting. The subject's dark coat sits near the street shadows, while the window and sky approach the brightest range. The goal is not to reveal every brick or reflection. It is to keep the crossing figure legible, retain useful highlight variation, and allow enough darkness for the scene to remain dusk rather than an artificially brightened daytime view.
2. Capture With Room to Edit
None of the later steps can replace what the capture provides. The practical goal is to protect the important highlights, avoid unnecessarily destructive in-camera processing, and preserve enough tonal and color information to make real choices later. Composing intentionally matters too: a slight shift in framing can change whether the crossing figure reads against the street or disappears into it. The photograph should arrive with its identity intact.
3. Import Into CineLook
In Studio, the image becomes the center of the workspace. Import accepts JPEG, PNG, and WebP files, plus TIFF files on supported desktop layouts when TIFF support is enabled, and the loaded frame stays the reference for every later decision. Replace works the same way when a newer version of the capture arrives. No preview is final; the point of the workspace is that the photograph remains visible while choices are made around it.
4. Choose a Visual Direction
A vivid travel direction could make reflections energetic, but it risks turning signs and wet color too loud. Cine Noir would simplify the palette dramatically, yet remove the warm-cool relationship that defines this frame. Modern Drama offers a more restrained starting point: dimensional contrast, controlled saturation, and room for the mixed light to remain part of the story. This is a choice for this representative image, not a universal city formula.
The public Looks library works the same way as the Look Browser in Studio. A direction chosen on a page can open in Studio and continue in the same session, which keeps discovery and editing connected. What matters is that a Look is a starting point, not a verdict.
5. Evaluate Before Adjusting
Before touching a control, read the frame: where does the eye land, which highlights matter, where do shadows need separation, and how do warm and cool regions relate? RGB and Luma histograms describe the rendered values, and AI Color Analysis can add another perspective. Both are guidance. The subject, the light, and the intended mood decide what the image needs.
6. Refine the Image
After selecting the direction, overall Exposure is judged around the crossing figure. Shadows can open slightly if coat and street merge, but should not reveal every dark corner. Highlights can be restrained where the window and sky lose useful variation. Contrast is then revisited because the initial Look and exposure correction interact. The Luma histogram supports this assessment, but the frame decides which edge values matter.
Temperature and Tint should preserve rather than neutralize the mixed lighting. The warm storefront can remain warm, the sky cool, and the pavement carry both. Saturation may need restraint because reflections concentrate color into small bright regions. Vibrance can adjust quieter color differently, but neither control understands the subject. RGB feedback helps identify strong channel behavior; it does not demand that channels align.
A modest amount of grain can support texture in the road and architecture, while excessive grain competes with naturally noisy dark areas. Bloom may soften bright practical lights, but it is a spatial effect and should be judged at realistic size. Vignette can focus attention toward the crossing path if it remains subtle. These choices are part of the visible image result and will not be preserved in a `.cube` LUT.
7. Compare Original and Graded
Compare Original and Graded to confirm that the final direction organizes what was already present. The graded image should retain evening, mixed light, and the wet street while making the subject easier to follow. If the result could have come from any city at any time, the grade has probably replaced too much of the source's identity.
Compare is useful early and often. It is easy to adapt to an over-processed image within a few seconds. By keeping Original and Graded available, CineLook makes the question concrete: is the edit helping the subject, or is it just changing the image?
8. Use Layers / History Where Appropriate
In this workflow Layers and History are available without being required. If a different crop might strengthen the frame, Layers lets the user test it while the grade stays visible. History makes it easy to step backward and compare alternatives without losing the current state. Their role is to support the decision, not to add steps.
9. Prepare the Final Export
The intended use determines export. PNG and TIFF provide lossless finished images; JPEG or WebP can reduce size when delivery needs it. Resolution, fit, quality, and filename should be confirmed before export. The downloaded file deserves a final check outside Studio, where normal screen brightness and compression reveal whether shadows, reflections, and fine gradients still work.
If a reusable color transform is needed, CineLook can export a `.cube` LUT separately. That is a different commitment from a composed image: the LUT carries color mapping, while visible spatial effects such as Grain, Bloom, and Vignette remain outside it.
10. Final Lesson
The approach can be applied to any city photograph you choose. The editorial reasoning does not depend on fabricated capture details. It depends on a repeatable habit: observe what makes the frame specific, choose a direction that supports it, refine relationships in order, and deliver the result intentionally.
The grade succeeds when the city still feels observed, not replaced.Shape a city image in Studio